Hi,
The finished article.... read on for more info.....
Although this has been titles "Varnishing Dark Age Period Miniatures" the same methods would be suitable for any period really. This is a simply a brief run through of how I personally prefer to varnish my miniatures. I realise that everyone will rightly have their own way of doing things, not only that, different individuals will get different results from using the exactly the same processes!
This is simply the way in which I go about it and hopefully some of the information be useful for some of you? If not, then maybe of interest? I am a bit of a geek when it comes to painting; it is not unknown for me to have had conversations lasting several hours in person or even over the phone discussing painting! And yes, I do need to get out more, which unfortunately for me, is not really possible at the mo'.
Before I start, all the images in this article are "clickable" to help illustrate what I am referring to.
Also, before I go any further, I really ought to add, before spraying any varnish (or undercoat) on any miniatures I find that heating up the tin by placing it on a thick towel on top of a radiator for 20 minutes is very helpful in exciting the molecular structure of the medium. I also shake for 5 minutes, which is well in excess the one or two minutes recommended by most manufacturers. The point is somewhat obvious, you want the spray to be as well mixed as is possible. If you live in a cold climate or have cold winters, try setting up a spray booth in your house. A decent cardboard box and a couple of light sources are all you need. Just make sure the ventilation is good and that any children are out of harms way.
Glossing:
So, the first thing I do is to get a medium bristle synthetic brush and give the miniatures a good dusting off . A brush not so soft as to leave dust in the recesses of the miniature but not so hard that it will take any of your paintwork off (this is something I do prior each painting session too). It's amazing how much dust can gather, even overnight and this can ruin the varnishing process even before you begin.
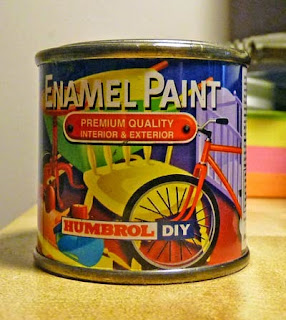
I use one of two options for glossing. My number one choice is brush on Humbrol DIY Enamel Gloss paint from a tin. This is super strong stuff when it has gone off. I bought several tins in bulk many years ago and still have a few left. Apply with an old synthetic brush and a small amount of thinners/white spirit making certain that you do not allow the varnish to pool or 'bubble'. Be sure to use an old reasonably stiff brush which can be cleaned with thinners/white spirit after the job is done. Oh, if you ever plan on using the brush again, clean it in white spirit after applying the varnish!
My second option for Gloss is to use Humbrol Enamel Gloss spray. This comes small in 150ml cans and it is just as more or less good as the brush on, certainly a lot more convenient but one has to be very careful not to let the varnish pool. If you do get any pooling I have found that a lint free cloth can be carefully used to 'pull' and excess away.


Very nice indeed I have shared your post here https://wargames-directory.com/forums/topic/varnishing-dark-age-period-miniatures-gloss-and-matt-my-way/
ReplyDeleteFeel free to join and share your work
Take care
Andy
Thanks Andy. Is it free?
Deleteyes totally free
DeleteGreat, I'll join ASAP.
DeleteBrilliant
DeleteGrest info Darrel.
ReplyDeleteCheers Ray.
DeleteAmazing idea. I'll try your method ASAP. How W&N spray works with low temperatures? Is it like other sprays and leave some snow effect on figures?
ReplyDeleteThanks for the comments Bartek. The two command bases which are fully varnished- the finished product- were both sprayed at about 10 degrees (max) in my garage and they came out well. If it is very cold, I would consider setting up a small spaying booth indoors. I do this in my conservatory and put the heating on half an hour prior to doing so.
DeleteIf you're worried about the effect of humidity, or lack of, on spray varnish then you could always try the brush on MIG Ultra-Matt Lucky Varnish. I haven't tried it yet and would be very interested in the results, especially over Humbrol brush on Gloss Enamel :)
Thanks. I'll try your method with next figures.
DeleteDon't forget to try pout the MIG Ultra-Matt Lucky Varnish as it could save you a big headache if you're worried about the temperature :)
DeleteAlways interesting to see how others varnish. When I am spraying I use W&N Professional Matt varnish now as well. If I am using a brush, I mix up a touch of Tamiya flat base with W&N Galeria. The flat base will matt any paint or finish. I use the Galeria mostly as I already had quite a bit of it.
ReplyDeleteTom
Thanks Tom. I had a bad experience with speckling with W&N Galleria so stopped using it many years ago. I've used all sorts of stuff over the years but I have luckily managed to settle (again) on something I'm very happy with. I just hope W&N do a Dullcote and change their formula! I'm going to give MIG a shot just as soon as it pops through my letterbox. I've heard *very* good things about it so fingers crossed. It would help me breath easier if I was to have something to fall back on if needed.
Delete